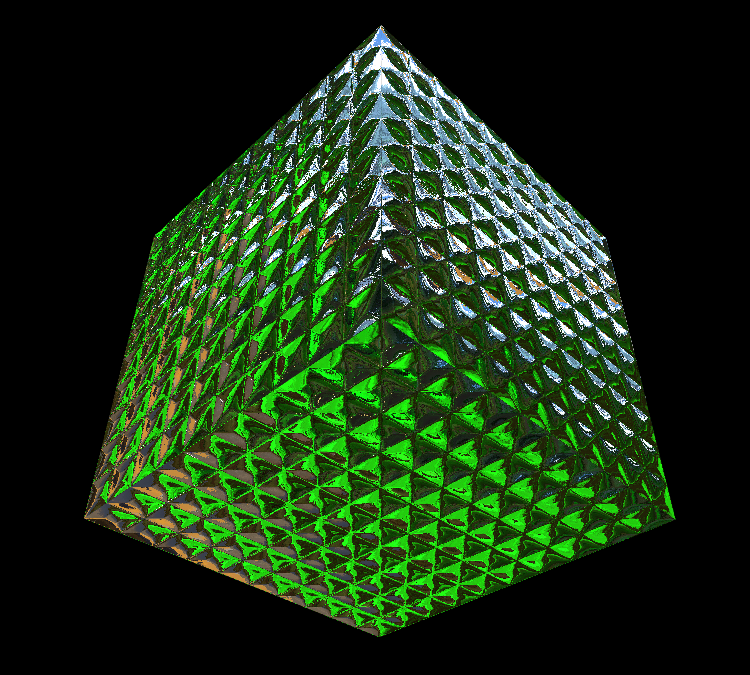
Tuesday, 27 September 2016
Sound and Motion
A couple of new experiments testing the Maximo system for use in Unity, and synchronising animation and sound together. I feel Unity is missing a sound bar in the animation timeline, which would enable more accurate synching, and be a big help with the animation.
The figure is again from my forthcoming AR book about the universe.
WebGL demo
Monday, 26 September 2016
We Are All Made of Stars...
I've been playing around with this fantastic dataset HYG. It contains 120,000 star positions and magnitudes. I've coupled it with the constellations from NASA and made a Sky map, that isn't a skymap. That is to say, it's made of particles rather than the traditional bitmap image.
Several advantages there. First I stripped down the data to the 10,000 stars visible to the naked eye.
The resulting dataset is about 450Kb, compared to several megs for a comparable image map.
Then I've changed the colour from pitch black to a inky blue, which is more the color you see most nights. Obviously that can be easily selected from the Camera background colour. The stars also shimmer ever so slightly. To add a bit of interest the constellations are interactive and display their name on mouse over.
This is part of a children's book I'm writing about the universe. More on that later...
Try it for yourself :) Mouse Wheel to zoom out and see the "star globe".
Monday, 12 September 2016
Fun with Particles
No matter what platform you use, sooner of later you're going to want to have a mess with particles.
The "fun" involved is trying to get them to do what you want. I've been playing with the Unity Particle system for a couple of days now. A lot can be achieved in the UI manually, but who wants to do things manually? So, getting to grips with the system via C# seemed (at first) the best way to go about it. The system has many ahem, idiosyncrasies that at times had me going mental, but in the end I managed to beat it into submission.
The result? I like to call it home. A little old place called the Milky Way...
The whole thing starts with a Big Bang (I am a stickler for details, so this does too).
Basically, you first have to generate all the necessary particles. It would be nice if you could set their size via script, but that would be too easy. Not all the properties you have at your disposal in the UI are available through the API, though there are workarounds for a few of them. I found I had to generate the particles first, then go back and scale them individually, not something you want in your Update function.
Issue 2. After piffling about drawing Force graphs to emit the particles in a nice spiral, I found it was WAY easier to rotate the emitter as it was generating the particles. This was great, only I had to do it in WORLD coordinates. No problem, except after generating them, you can't then rotate them, by rotating the parent object. So, after a few shandies I managed to figure out how to generate in world coordinates and then switch to LOCAL afterwards. All well and good, except for a strange anomaly.
When changing emitter to LOCAL (actually finished emitting at that point), the transformation the parent object already had somehow get's lost. So to summarize, first create your emitters, facing in the direction you want and spew your particles into world space. When finished change to LOCAL, and apply the transformation the parent object had before you switched. Simples!
I could write a short book about the ForceOverLifetime module, but I doubt it would be a best seller. If you ever mess with it, to attempt a circular motion, Good Luck! Just remember that if you apply a force in one direction you need to double the force to make it go in the other, so the usual SIN/COS technique for a circular path simply doesn't apply.
There's 40400 particles here, and I must admit I'm impressed with the performance, even on my 3 year old mobile.
It wasn't purely for fun, this is a to illustrate a page an AR book I'm writing for children to learn the wonders of the universe, from the Big Bang to the Special and General relativity. Hopefully that will be a best seller...
The "fun" involved is trying to get them to do what you want. I've been playing with the Unity Particle system for a couple of days now. A lot can be achieved in the UI manually, but who wants to do things manually? So, getting to grips with the system via C# seemed (at first) the best way to go about it. The system has many ahem, idiosyncrasies that at times had me going mental, but in the end I managed to beat it into submission.
The result? I like to call it home. A little old place called the Milky Way...
The whole thing starts with a Big Bang (I am a stickler for details, so this does too).
Basically, you first have to generate all the necessary particles. It would be nice if you could set their size via script, but that would be too easy. Not all the properties you have at your disposal in the UI are available through the API, though there are workarounds for a few of them. I found I had to generate the particles first, then go back and scale them individually, not something you want in your Update function.
Issue 2. After piffling about drawing Force graphs to emit the particles in a nice spiral, I found it was WAY easier to rotate the emitter as it was generating the particles. This was great, only I had to do it in WORLD coordinates. No problem, except after generating them, you can't then rotate them, by rotating the parent object. So, after a few shandies I managed to figure out how to generate in world coordinates and then switch to LOCAL afterwards. All well and good, except for a strange anomaly.
When changing emitter to LOCAL (actually finished emitting at that point), the transformation the parent object already had somehow get's lost. So to summarize, first create your emitters, facing in the direction you want and spew your particles into world space. When finished change to LOCAL, and apply the transformation the parent object had before you switched. Simples!
I could write a short book about the ForceOverLifetime module, but I doubt it would be a best seller. If you ever mess with it, to attempt a circular motion, Good Luck! Just remember that if you apply a force in one direction you need to double the force to make it go in the other, so the usual SIN/COS technique for a circular path simply doesn't apply.
There's 40400 particles here, and I must admit I'm impressed with the performance, even on my 3 year old mobile.
It wasn't purely for fun, this is a to illustrate a page an AR book I'm writing for children to learn the wonders of the universe, from the Big Bang to the Special and General relativity. Hopefully that will be a best seller...
Sunday, 28 August 2016
Hello Unity, AIR I still love you.
It's been quite a slow summer workwise, so I've had plenty time on my hands.
I've been toying with an idea to create a "digital pop-up book", that is to say a book that comes complete with a google cardboard headset, and combines a story with Augmented and Virtual Reality.
I created the first version in AIR, and did manage to get everything working. However, performance was not great. I was using four Stage3D Proxies, which worked fine on my own phone, an Oppo 7 Find, but on smaller phones some levels would disappear for no apparent reason, though I suspect there wasn't enough VRAM available. The Oppo has a dedicated graphics chip, and can easily fool you into thinking everything's pukka.
So, time to look at alternatives. I've messed with Unity since the very early days, when I actually talked with David Helgason, one of the founders, and got a free license. The whole thing started in Denmark, and I was a member of the Web3D Consortium, still trying to make solutions with X3D. At this time Flash ruled supreme, so there was no point (for me) to learn Unity. I'd made a javascript bridge between Flux Player (a then open-source X3D engine) and Flash Player, and was having a whale of a time programming in ActionScript and seeing results in 3D. Made a few good solutions on that basis, before Flux player suddenly became a closed technology, and carried a very hefty license fee.
Just when I thought I would have to drop Flash, in order to carry on working with Web3D, Stage3D came along and I've rarely looked back since. But it's time to look forward.
Now, as then, when I open Unity I can't help feeling I've gone back to the Flash MX days.
Attaching scripts to actual graphical objects the way we used to, each MovieClip having an onClipEvent(load) and onClipEvent(enterFrame). I wonder if that was the inspiration for Unity's Start(), Update() template?
In Unity the MovieClip is loosely replaced by the GameObject. That's another thing that put me off Unity. It assumes you're making a game, which generally I'm not.
Unity allows you to program in JavaScript or C#. I was tempted to go with the JavaScript approach, but that seemed like a step backwards after all that AS3 OOP goodness, so I've learned to use C#.
The transition has been completely painless, for apart from slight differences in syntax, everything is quite familiar.
I'm used to sitting with pages of code in FlashDevelop, and only seeing my 3D creations after compiling. I actually wanted a similar workflow in Unity, though now I am getting used to the way Unity works, and the ability to create structure, without necessarily having a "Main" class.
(I found out how to do that too, but don't need my comfort blanket quite as much any more :)
In Unity you do set a lot of variable and properties through the User Interface, but the user interface is created from your own code, so basically if you work the way I do, you are building a custom user interface for Editing and tweeking your application as you go along. This is actually a very cool approach. I just never got that far in my previous brief attempts to master Unity.
Once you discover the power of a full blown 3D engine, it's easy to go mad.
As I work primarily on Mobile and tablet, I have had to tone it down a bit, but it's fantastic to be able to work in a WYSIWYG environment again, the way we used to in the early Flash years.
Visual Studio is a pleasure to code in. Once I got the intellisense working, I've been able to use it to discover all the properties and methods available on different types of objects and I'm now feeling just as at home as in FlashDevelop.
Unlike most Flashers, I'm not quitting AS3 to take up a new technology, just adding to my toolbox.
Now I'm feeling comfortable with C# a whole new world has opened up and I'm excited to see where it takes me.
My first experiments have been in "Mixed Reality", that is a combination of Virtual and Augmented reality using the Vuforia library. Sometimes it's so easy it feels like cheating. While ActionScript has always been a challenging platform to master (and therefore in itself very satisfying when getting something to work!!), the combination of Unity and C# provides a powerhouse of new possibilities, as all the simple stuff is taken care of. I'm not used to anything being "under the hood", and even libraries like Away3D, I've customised and modified for my own ends.
Though I've had to go from Flash Hero to Unity Zero, I'm quickly clawing my way up to where I can call myself a Unity Developer.
I've been toying with an idea to create a "digital pop-up book", that is to say a book that comes complete with a google cardboard headset, and combines a story with Augmented and Virtual Reality.
I created the first version in AIR, and did manage to get everything working. However, performance was not great. I was using four Stage3D Proxies, which worked fine on my own phone, an Oppo 7 Find, but on smaller phones some levels would disappear for no apparent reason, though I suspect there wasn't enough VRAM available. The Oppo has a dedicated graphics chip, and can easily fool you into thinking everything's pukka.
So, time to look at alternatives. I've messed with Unity since the very early days, when I actually talked with David Helgason, one of the founders, and got a free license. The whole thing started in Denmark, and I was a member of the Web3D Consortium, still trying to make solutions with X3D. At this time Flash ruled supreme, so there was no point (for me) to learn Unity. I'd made a javascript bridge between Flux Player (a then open-source X3D engine) and Flash Player, and was having a whale of a time programming in ActionScript and seeing results in 3D. Made a few good solutions on that basis, before Flux player suddenly became a closed technology, and carried a very hefty license fee.
Just when I thought I would have to drop Flash, in order to carry on working with Web3D, Stage3D came along and I've rarely looked back since. But it's time to look forward.
Now, as then, when I open Unity I can't help feeling I've gone back to the Flash MX days.
Attaching scripts to actual graphical objects the way we used to, each MovieClip having an onClipEvent(load) and onClipEvent(enterFrame). I wonder if that was the inspiration for Unity's Start(), Update() template?
In Unity the MovieClip is loosely replaced by the GameObject. That's another thing that put me off Unity. It assumes you're making a game, which generally I'm not.
Unity allows you to program in JavaScript or C#. I was tempted to go with the JavaScript approach, but that seemed like a step backwards after all that AS3 OOP goodness, so I've learned to use C#.
The transition has been completely painless, for apart from slight differences in syntax, everything is quite familiar.
I'm used to sitting with pages of code in FlashDevelop, and only seeing my 3D creations after compiling. I actually wanted a similar workflow in Unity, though now I am getting used to the way Unity works, and the ability to create structure, without necessarily having a "Main" class.
(I found out how to do that too, but don't need my comfort blanket quite as much any more :)
In Unity you do set a lot of variable and properties through the User Interface, but the user interface is created from your own code, so basically if you work the way I do, you are building a custom user interface for Editing and tweeking your application as you go along. This is actually a very cool approach. I just never got that far in my previous brief attempts to master Unity.
Once you discover the power of a full blown 3D engine, it's easy to go mad.
As I work primarily on Mobile and tablet, I have had to tone it down a bit, but it's fantastic to be able to work in a WYSIWYG environment again, the way we used to in the early Flash years.
Visual Studio is a pleasure to code in. Once I got the intellisense working, I've been able to use it to discover all the properties and methods available on different types of objects and I'm now feeling just as at home as in FlashDevelop.
Unlike most Flashers, I'm not quitting AS3 to take up a new technology, just adding to my toolbox.
Now I'm feeling comfortable with C# a whole new world has opened up and I'm excited to see where it takes me.
My first experiments have been in "Mixed Reality", that is a combination of Virtual and Augmented reality using the Vuforia library. Sometimes it's so easy it feels like cheating. While ActionScript has always been a challenging platform to master (and therefore in itself very satisfying when getting something to work!!), the combination of Unity and C# provides a powerhouse of new possibilities, as all the simple stuff is taken care of. I'm not used to anything being "under the hood", and even libraries like Away3D, I've customised and modified for my own ends.
Though I've had to go from Flash Hero to Unity Zero, I'm quickly clawing my way up to where I can call myself a Unity Developer.
Thursday, 20 March 2014
Further Adventures in AGAL
I'll be honest, when I first saw AGAL some years ago, I just knew it was too obtuse and complicated for me. I was sure they'd make it easier in the next release, but 3 years later I'm still waiting.
Time to take the plunge. There's loads of great articles about AGAL and how to set it all up. It requires a ton of boiler plate AS3 code before you even get to the shader programming, but that part is at least just about identical every time so after a couple hours of wading through it line by line, you don't need to think about it any more.
I've made shaders in PixelBender, so the concept isn't entirely new to me, but in pixel bender you write a routine which is executed on each pixel. In AGAL you write a routine that is executed first on every vertex, and then on every pixel (or fragment) between them.
One of the really annoying things is the way you have to declare any variables you're going to use outside of the actual program. So you end up hopping around between shader code and AS3. The next hurdle is the actual names of the variables, as you don't get to name them yourself. vc0 for example is a vertex constant in register 0, but rather than assigning something to vc0 (vc0 = would have been nice!) you would write something like..
context3D.setProgramConstantsFromVector(Context3DProgramType.VERTEX, 4, sway, -1);
Believe it or not, that has assigned a vector ("sway") to vc0.
As they say in the Matrix, "after a while you don't even see the code". I wish!
With all the register indexes and two letter names it is very easy to make mistakes.
I'm not going to attempt to explain the mechanics, as it's been done to death and way better than I could.
I recommend starting with http://blog.norbz.net/tutorials/ and if you can get hold of this book, all the better.
And this is your Bible:
http://www.saltgames.com/2011/stage-3d-shader-cheatsheet/
That will get you up and running, but then what? There's simply tons of articles about shader programming out there, but precious few about AGAL specifically.
For a bit of inspiration I recommend a trip to shadertoy.com, but be warned, your browser will probably crash a few times, and your laptop will melt. These are GLSL shaders for WebGL, so while they may give some ideas it's far from obvious how to implement them in AGAL, and once you get past the basics of Stage3D there's not much help around.
An excellent free resource is the GPU Gems series, hosted at Nvidia.
This evening's experiment has been implementing this little ditty, animated grass.
http://http.developer.nvidia.com/GPUGems/gpugems_ch07.html
These books are great, as they explain the concepts, rather than the code.
One of the most beautiful sites you'll ever see in Denmark is a stiff sea breeze causing waves in a ripe field of barley. That was what I decided I'd try to emulate.
As I was working with an example that had different Blend modes, I left them in (After clicking on the window use "B" to switch). I also wanted to explore and understand the mip mapping modes, so you can go through all those by pressing SPACE. Oh, and to prove it's not baked, you can use your mouse to effect the grass too.
Frame rate varies wildly. There are exactly 65536 polygons in this example, all being animated independently in groups of 16 (i.e. a single blade of barley).
There are definitely more efficient ways, but it runs at 60fps on my laptop. I can see online its not quite so good.
What kills performance here is not the shader, but the fact I'm reading in Perlin noise from a BitmapData animated in Flash for every cycle. I'm sure there's a better way, but it's late enough as it is...
Source
Saturday, 15 March 2014
MatCap in AGAL

Carrying on from the previous posts, as an exercise in AGAL I've tried implementing MatCap with Normal map in pure AGAL, based on an excellent example by Norbz
Source including maps and FlashDevelop project
Thursday, 6 March 2014
MatCap with NormalMapping
What do you get if you cross this:
With this...
Continuing on from the previous post, I've now implemented normal maps into the MatCap material.
Took a lot of head scratching, and it could almost certainly make more use of the Away3D framework, but I ended making the MatcapPass a multitexture shader, and implemented my own normal map routine.
source files including demo usage.
The shader code
Enjoy!
Tuesday, 4 March 2014
MatCap Materials, and Smooth Soft Shadows for Away3D
Today I'm going to introduce a couple of techniques for improving realism, while reducing the load in real-time 3D scenes using Away3D 4.0.
You might be surprised to learn there are no lights in this scene whatsoever. Neither are the materials "baked" in any way. In fact this nice shiny plastic material can be applied to any object with mapping coordinates, though curvy, organic shapes work best.
It is known as a "MatCap" material, and was developed for Away3D by Przemek. (props!)
http://away3d.com/forum/viewthread/5255/
This type of material has long been available in Z-brush, among other packages.
The material consists of a single bitmap of a sphere and a shader that reads values from the bitmap and apply them to the object dependent on a faces angle to the view.
Here's the map used, plus a couple more examples.
You'll find more on MatCap, or Material Capture shaders all over the web. Here's a nice intro vid.
Here's the source, including the version of MatCapMaterial available at time of posting.
Apart from the actual material, take a look at the soft subtle shadow under the teapot. To get such a soft shadow I would normally render the scene using a raytracing renderer such as Mental Ray and attach it to a plane below the object, as it's just about impossible, and extremely processor intensive to do in real-time.
Currently I'm working with objects that are created in real-time, so rendering the shadow in MAX is simply not an option. To get around this I made a class called SuperSoftShadow (also provided in the source download, together with a FlashDevelop project file)
In the examples above and below the shadow is drawn dynamically when the scene initializes, and from then on uses no processor at all, it is a simple plane with the shadow TextureMaterial attached, and a BlendMode.MULTIPLY to blend it in with the background.
A couple of Gotchas there. The background here is an actual plane in the scene. If you try to use BlendMode.MULTIPLY on a background using the view3D.background, the whole screen turns black(!). Another thing I've discovered is the alpha value appears to be ignored when using blend modes.
What the SuperSoftShadow class does, is given an ObjectContainer3D such as a Loader3D, takes a snapshot using an Ortographic camera placed above, and then uses AS3's built in BlurFilter to soften it as much as you like. The resulting bitmapData is then applied to a texture on a plane, also created dynamically to match the size of the container.
Here's how to use it:
shadow = new SuperSoftShadow(container, this.stage, blur, size, yoffset, shadowColor, distance);A look at the constructor describes the parameters.
container - The container to apply the dropshadow to. This can be a loader3D.
stage - Reference to stage required for creating stage3D instance.
blur - The blur amount for the shadow. Note that using larger bitmap sizes requires using large blur values.
size - The size of the bitmap to use. This can be any power of 2 dimension (512 x 512, 1024 x 1024, 2048 x 2048...etc.) The bigger the bitmap the better the quality.
yoffset - This is the y position within the container, which the shadow will be attached to. The class attempts to place the shadow directly underneath the container (minY) though this may not be the desired position.
shadowColor - A hexadecimal code for the colour of the shadow. This can be useful for radiosity effects for glowing objects, glass objects, etc.
distance - An optional value to control the cross-section of the object container to use. This controls the near plane of the camera that takes the snapshot.
Another example using dynamic text...
(if you don't have the patience to watch it turn slowly, try the arrow keys :)
You can enter your own text to see the dynamic shadow in action. You can also adjust the extrusion depth of the text with up and down arrows, but you need to press ENTER to update the shadow, or the text.
The material for the text uses yet another technique, image based lighting, a bit more tricky, but worth the effort :)
Enjoy!
Friday, 22 June 2012
New Mouse Events for Away3D 4.0
It's about time I posted something useful.
Hopefully this will be of use to budding 3D application developers everywhere :)
I've extended the Away3D Mouse3DManager and MouseEvent3D classes to accept the right click and middle click events recently added to Flash Player (Novemeber 2011, I think)
Remember to update your compiler and target Flash Player 11.2 or later. I had to do a bit of mucking about in FlashDevelop to get it working myself, which may well explain why it's not yet in the official Away3d library. Here's a really crazy, wild demo to show it works...
And here are the files...
Mouse3DManager.as
MouseEvent3D.as
Usage Example:
ExtraMouseEvents.as
Enjoy!
I've extended the Away3D Mouse3DManager and MouseEvent3D classes to accept the right click and middle click events recently added to Flash Player (Novemeber 2011, I think)
Remember to update your compiler and target Flash Player 11.2 or later. I had to do a bit of mucking about in FlashDevelop to get it working myself, which may well explain why it's not yet in the official Away3d library. Here's a really crazy, wild demo to show it works...
(Click image to open demo. Click/Scroll on ball to see events triggered)
And here are the files...
Mouse3DManager.as
MouseEvent3D.as
Usage Example:
ExtraMouseEvents.as
Enjoy!
Thursday, 9 February 2012
Flash is Dead, Long live AIR
Gravestone Generator
If you're on my blog, you probably belong to the group of us who appreciate Flash as a rapid development platform that just works, if you understand what you're doing.
If you're a Flash hater, you will no doubt have been delighted to read Adobe's latest press release, with yet more troll fodder.
http://blogs.adobe.com/flashplayer/2012/02/flash-chrome-for-android-beta.html
So, where does that leave Flash actually? It will no longer be attractive for advertisers, as they want maximum reach, which will leave it to game developers, and serious application developers. Perfect.
Drop the ads you don't like in Flash, download the apps and games you do like as AIR (though you'll never even know what language they're written in, right?)
What about advertising? We all love free content, but how will websites pay the bills?
Here's a message to all the Flash haters, which I admit is a large, or at least very vocal group:
Prepare to become HTML5 haters.
Advertising pays for content creation, advertisers compete for your attention. Everything you hated in Flash will now be created in HTML5, and here's the rub, you won't be able to turn it off any more. You won't be able to disable or remove the plugin (not many flash haters actually do remove the plugin, strangely. Make your own conclusions).
As for flash developers, should we drop flash and become "interactive developers" as some Flash evangelists would have you believe? Considering the new firepower Flash 11 has got, it's never been a better time for actually making flash apps and games. The distribution model is changing, and definitely if you are a banner ad designer you should be jumping ship. For those of us that develop applications, Objective C or Java would make sense, to keep with the times and go mobile. But wait, why not just use AIR?
At this moment AIR with hardware acceleration hasn't been released, and despite all my efforts I haven't found even as much as a target launch date. But it is in closed Beta, and Adobe are showing it off so why not stick it out, the last 10 years might not have been a complete waist of time after all...
Monday, 24 October 2011
Cubic Bezier Curves - Flash 11
With all the (deserved) hype surrounding Stage3D, it's easy to miss some of the other great new features of Flash Player 11.
Over the weekend I tried and failed to find an example of Cubic Bezier Curves (cubicCurveTo), so there was no way out but to build one. In the past this would required a degree in maths and a minimum 4 litres of Red Bull, but with the new command any idiot can do it, and here's the proof...
DEMO
Click to add a point, click and drag to set the bezier curve. Right click to either "end" or "close" the polygon.
Once the polygon is drawn, use the control points to change the curves and vertex positions.
Press "Reset" to, err, reset.
And here's the source to get you started on your very own Illustrator clone.
Over the weekend I tried and failed to find an example of Cubic Bezier Curves (cubicCurveTo), so there was no way out but to build one. In the past this would required a degree in maths and a minimum 4 litres of Red Bull, but with the new command any idiot can do it, and here's the proof...
DEMO
Click to add a point, click and drag to set the bezier curve. Right click to either "end" or "close" the polygon.
Once the polygon is drawn, use the control points to change the curves and vertex positions.
Press "Reset" to, err, reset.
And here's the source to get you started on your very own Illustrator clone.
Friday, 23 September 2011
15 Seconds of Fame
Away3D 4.0 Showreel 2011 using Flash Player 11 beta from Rob Bateman on Vimeo.
Well, actually not quite 15 seconds, but we managed to get 2 demos into the new Away3D showreel.
Tuesday, 13 September 2011
Introducing Atomizer
As seen in an earlier post, I've been messing with image based 3D. That is to say encoding 3D information into video. The technique is showing some promise, and I've started formalising it into an exporter for 3D Studio MAX and an AS3 library for Flash/Away3D. Here's another quick example. Please view in fullscreen.
To the right of the curtains you will see a small, wierd animation/film, that looks like this:
That is actually all the information needed to drive the curtain animation, that is happening realtime, as appose to a video. The vertex positions are simply captured and made into a video, that could be streamed over the net.
As you can see the video is very small. As described in a previous post it can also be applied to meshes of varying resolution.
Here's the same 3D animation with camera control
http://www.videometry.net/atomizer/cam/
.
Flash Player 11 - Release Candidate 1
We are approaching probably the most exciting Flash Player release in history!
Not since version 4 introduced scripting has there been a more major update.
We've been through quite a few beta versions, and visitors to the site will likely have experienced broken demos, as with each development cycle updates were necessary, and if you didin't have the right player, for the right demo, it was tough luck.
This morning, rather than play my customery game of online Scrabble, I went through all my old experiments and recompiled for Flash Player RC1. As the name suggests, this is not the final version, but it's worth testing some content with it, and reporting to Adobe any issues you might come across.
I'm sad to see that support for Intel graphics has been removed as it was running beautifully on my media center before this release. Apart from that, it seems very stable. Look forward to seeing it on mobile soon :O)
Not since version 4 introduced scripting has there been a more major update.
We've been through quite a few beta versions, and visitors to the site will likely have experienced broken demos, as with each development cycle updates were necessary, and if you didin't have the right player, for the right demo, it was tough luck.
This morning, rather than play my customery game of online Scrabble, I went through all my old experiments and recompiled for Flash Player RC1. As the name suggests, this is not the final version, but it's worth testing some content with it, and reporting to Adobe any issues you might come across.
I'm sad to see that support for Intel graphics has been removed as it was running beautifully on my media center before this release. Apart from that, it seems very stable. Look forward to seeing it on mobile soon :O)
Friday, 2 September 2011
Playing Havok with Flash 11
click here to open (requires Flash 11 beta2 or higher)
I remember the title of a book for salesmen, called "Fake it 'til You Make It", the idea being to fake being successful until you actually become successful. While I haven't been able to make a physics engine to rival Havok in AS3, I have found a novel way to fake it by using reactor (powered by Havok in 3D Studio MAX) to create simulations I can export to Away3D.
The resulting animation is written into a series of bitmaps that together form a small movie of the vertex movements.
Although the animation is baked (and the observant will notice it runs in a ping-pong loop right now) it's still possible to adjust the amount of effect (here "Wind Speed") programmatically, so you could call it "Half Baked".
Borrowing from a bloke called Einstein, I applied my own little "theory of relativity" and registered deviations from the rest position instead of absolute values. This way you can "mix" in the animation and even apply it to completely different meshes.
I soon realised that the resulting "animation movie" or "video space warp" (the funny coloured blocks you see when not running in Fullscreen) was actually resolution independent, that is to say it could be applied to meshes of any number of vertices. That helped solve another issue I was having, LOD. With this image based method you can achieve seamless level of detail changes even while the animation is running.
Flash is great at interpolating pixel colours, so you can even read values between pixels without much maths.
I realise that one could just register all the vertex positions into a ByteArray (which is actually what is happening under the hood) but I think it's nice to be able to see the animation and it's certainly easier to interpolate between values for different Mesh resolutions.
Another benefit I'm exploring is streaming the animation, after all video streaming and compression are built into Flash, so why not? Take it a step further and you could stream 3D scenes over an ordinary TV signal.
If you'd got the time and $'s you could completely redefine the idea of "3D TV"...
Much more to come, I suspect :O)
MaxScript
I've just realised I've been wasting my life for the past 15 years...
Though a regular user of 3D Studio MAX (I even taught it for 4 years), Maxscript has always been a closed book to me. Maybe it's because it wasn't there when I started using 3D Studio in DOS. Everytime I've looked at a MaxScript I've been put off by the lack of punctuation and thousands of reserved words, etc. and never thought I'd get my head round it. The other day I was more or less forced to.
I wanted to output image maps from Max, based on vertex positions (more on that in next post).
The way I started was to export the mesh, import it into Away3D then I could read the values out and save them as I wished. The only problem was I needed to save the vertex positions for 350 models and that's a lot of manual work! (== I would hate it). I found a MaxScript that could output the models for me automatically, but then I was going to have to build an AIR app to process them.
Then I thought it must be possible to use MaxScript to output the images directly. About 50 hours later it was :) Plus I'd learned a ton of other stuff I just never knew was possible. Writing custom exporters for Max is now a part of my tool set. If only I'd bothered to learn it years ago I could of saved myself weeks of work, using whatever tools I could find/afford on the net.
If you haven't taken the plunge yet, I'd encourage you to look at it. The language has it's quirks (to say the very least, for example some arrays are 0 based, some start with 1, wtf !?) but if you were ever an ActionScript 1.0 developer you're used to that ;)
The best place for scripts is http://www.scriptspot.com/
If you're not into reading about MaxScript, you're in luck. John Wainwright, the creator of MaxScript made a tutorial video, and it's available free online at http://vimeo.com/album/1514565/video/19276145
Most the concepts will be familiar if you've scripted anything else before, but I'd encourage you to see it all anyway, there's a lot of detail and tips.
Good luck!
Though a regular user of 3D Studio MAX (I even taught it for 4 years), Maxscript has always been a closed book to me. Maybe it's because it wasn't there when I started using 3D Studio in DOS. Everytime I've looked at a MaxScript I've been put off by the lack of punctuation and thousands of reserved words, etc. and never thought I'd get my head round it. The other day I was more or less forced to.
I wanted to output image maps from Max, based on vertex positions (more on that in next post).
The way I started was to export the mesh, import it into Away3D then I could read the values out and save them as I wished. The only problem was I needed to save the vertex positions for 350 models and that's a lot of manual work! (== I would hate it). I found a MaxScript that could output the models for me automatically, but then I was going to have to build an AIR app to process them.
Then I thought it must be possible to use MaxScript to output the images directly. About 50 hours later it was :) Plus I'd learned a ton of other stuff I just never knew was possible. Writing custom exporters for Max is now a part of my tool set. If only I'd bothered to learn it years ago I could of saved myself weeks of work, using whatever tools I could find/afford on the net.
If you haven't taken the plunge yet, I'd encourage you to look at it. The language has it's quirks (to say the very least, for example some arrays are 0 based, some start with 1, wtf !?) but if you were ever an ActionScript 1.0 developer you're used to that ;)
The best place for scripts is http://www.scriptspot.com/
If you're not into reading about MaxScript, you're in luck. John Wainwright, the creator of MaxScript made a tutorial video, and it's available free online at http://vimeo.com/album/1514565/video/19276145
Most the concepts will be familiar if you've scripted anything else before, but I'd encourage you to see it all anyway, there's a lot of detail and tips.
Good luck!
Thursday, 21 July 2011
Setting up CS5 and CS5.5 to target Flash 11 player
I've seen a lot of people looking for a way to publishing Flash 11 content from the CS5 and CS5.5 IDE, so here's a quick guide...
(I don't have CS5.5 myself, or a Mac, but have set it up on a mates machine so I know it can be done, please bare with me!)
1. If Flash is running, close it. Go into your Flash directory (usually Programs > Adobe > Flash) and find Common > Configuration > ActionSctipt3.0
In that folder you should see several folders, including FP9 and FP10 etc.
Create a new folder and call it FP11.
2. Download the globalPlayer.swc from Adobe labs.
http://labs.adobe.com/downloads/flashplayer11.html
Save it in your new folder. (it will have a longer name, so rename it to playerglobal.swc)
3. You need to create a player profile, so you can choose Flash Player 11 from Flash.
Under Common > Configuration > Players you will see a bunch of xml documents. Open the one called FlashPlayer10_1.xml or any Flash 10 player file.
In that you will see a path to a playerglobal.swc
Change the path so it points to the one you just downloaded and change the name of the player, etc.
There's 2 lines I changed in my CS5 version:
and
(I don't know why it's version 13, but it is!)
Save the file in the same folder, as FlashPlayer11.xml
Here's a link to my file, if you're stuck, but it may vary slightly depending on where you have flash installed.
http://www.videometry.net/broomstick/FlashPlayer11.xml
Now you should be good to go!
Remember to choose Flash Player 11 in you publishing settings and Hardware Settings: "Level 1 - Direct" to turn on hardware acceleration.
When publishing, you need to publish direct to the browser (F12) as Flash will still have a F10 stand alone player for previewing/debugging.
If you want to run examples that use the EMBED tag you will need to download the Flex SDK.
Any questions, or variations you come across, just make a comment and I'll help if I can.
Good luck!
(I don't have CS5.5 myself, or a Mac, but have set it up on a mates machine so I know it can be done, please bare with me!)
1. If Flash is running, close it. Go into your Flash directory (usually Programs > Adobe > Flash) and find Common > Configuration > ActionSctipt3.0
In that folder you should see several folders, including FP9 and FP10 etc.
Create a new folder and call it FP11.
2. Download the globalPlayer.swc from Adobe labs.
http://labs.adobe.com/downloads/flashplayer11.html
Save it in your new folder. (it will have a longer name, so rename it to playerglobal.swc)
3. You need to create a player profile, so you can choose Flash Player 11 from Flash.
Under Common > Configuration > Players you will see a bunch of xml documents. Open the one called FlashPlayer10_1.xml or any Flash 10 player file.
In that you will see a path to a playerglobal.swc
Change the path so it points to the one you just downloaded and change the name of the player, etc.
There's 2 lines I changed in my CS5 version:
<player asversion="3" id="FlashPlayer11" version="13"></player>
and
<playerdefinitionpath as2="$(UserConfig)/Classes/FP10;$(UserConfig)/Classes/FP9;$(UserConfig)/Classes/FP8;$(UserConfig)/Classes/FP7" as3="$(AppConfig)/ActionScript 3.0/FP11/playerglobal.swc"></playerdefinitionpath>
(I don't know why it's version 13, but it is!)
Save the file in the same folder, as FlashPlayer11.xml
Here's a link to my file, if you're stuck, but it may vary slightly depending on where you have flash installed.
http://www.videometry.net/broomstick/FlashPlayer11.xml
Now you should be good to go!
Remember to choose Flash Player 11 in you publishing settings and Hardware Settings: "Level 1 - Direct" to turn on hardware acceleration.
When publishing, you need to publish direct to the browser (F12) as Flash will still have a F10 stand alone player for previewing/debugging.
If you want to run examples that use the EMBED tag you will need to download the Flex SDK.
Any questions, or variations you come across, just make a comment and I'll help if I can.
Good luck!
Thursday, 16 June 2011
BroomHill tech demo
To celebrate the newly unveiled Away3D website, and to showcase the power of Broomstick and Molehill compared to previous Flash players and Away3D frameworks, I wanted to share this little client demo. (Incubator player required).
UPDATE: Flash 11 Beta is out on labs and the example has been modified to run under the new F11 plugin. Incubator users should update before clicking the image below.
And my favourite, the "shwoosh", a real-time physics simulation that just shows how different this player/framework combo really is.
UPDATE: Flash 11 Beta is out on labs and the example has been modified to run under the new F11 plugin. Incubator users should update before clicking the image below.
Zooming in (mousewheel) reveals detailed textures mixing bitmap and vector graphics. (Just type in the box to change the text).
Getting even closer you can see the actual structure of the micro-mesh, even the microscopic holes.
And my favourite, the "shwoosh", a real-time physics simulation that just shows how different this player/framework combo really is.
Congratulations Away3D team on this awesome new framework and site :)
Tuesday, 17 May 2011
Mocap to Molehill, via 3D Studio MAX and Away3D Broomstick
After seeing David Lenaerts excellent Broomstick example, I've been eager to find a workflow to bring motion capture data into Flash. It took a while to work out, not being familiar with the MD5 format at all, but it turned out those nice guys at Away3D had already done all the hard work. I was thinking I'd have to map the bones of MAX's Biped to some other custom "MD5 scheme", but to my delight I discovered the parser is extremely generic and works with any bone structure I throw at it. I'd like to share my findings, not least in case I forget them before I need to do it again :O)
First a quick demo to show where we're headed...
(Click image to open, Flash 11 or incubator is required.)
WARNING: The page loads around 14Mb of Motion Capture data, so be patient. When it's finished the "player" should start moving on his own. Click to put the flash window in focus, then use arrow keys to run, and the top row of keys (Q to I) to trigger different mocap files.
You'll notice the motion is quite faithfully replicated, though there are some problems with the figure/bone structure around the shoulders. That could be fixed given the time, but I was satisfied with this as a proof of concept.
For this recipe you will need:
- Rigged model, downloaded free from TurboSquid
- Copy of 3D Studio Max (My copy is Max 9, others should work just as well)
- MD5 Export Script http://www.doom3world.org/phpbb2/viewtopic.php?t=1914
If you use that particular model you will see that it comes already rigged using Biped.
Biped is one of the Bone systems that ships with Max. Some love it, some hate it. The good thing is there's alot of free motion capture data recorded in the ".bip" format, to get you started.
Normally you use Max's Physique modifier together with Biped. This is a quite advanced system using muscles and tendons. The MD5 format doesn't support that system directly, so we need to use a Skin modifier instead.
(Click for larger image)
After you open the soccer player, select the model, right click on the modifier and select "Collapse All".
Now you should have an Editable Mesh. This is the only format the MD5 exporter can work with so it's worth remembering.
Now we have an Editable Mesh and a Biped lined up with each other, but not attached in any way.
With the player still selected, choose the "Skin" modifier.
Where it says Bones, press the "Add" button and assign all the bones of the Biped to the Skin modifier (this will be all the objects in the scene). Then you modifier stack should look like this:
Now it's time to load some Motion Capture (or Mocap) Data. Select Bip01 (easiest by pressing the H key and selecting it from the list of scene objects) and then under the motion panel, press the Load icon and find a .bip file from your harddrive. If you don't have any .bip files, here's one from the Max Tutorials.
You will find a folder full of .bip files on your Max DVD under Tutorials, as well as loads of free downloads on the net.
So now we should have an animation when you press play. The Soccer player should move in perfect synch with your Biped. You might notice a few odd bulges, especially round the legs and feet.
This is caused be the legs "pulling" on each other, and it's now we need to understand a little bit about how Skin and Bones (in this case Biped) work.
Each bone acts upon a group of vertices in the Skin. A vertex may have more than one bone acting upon it. So for each bone there is an array of indices for the vertices in the model that it effects, and not only that, but each of those vertices has a "weight", i.e. the amount the bone pulls on that vertex.
To make it easier in 3D Studio, and other 3D programs, the bones are assigned an Envelope. This simply means a sausage shape around the bone's core that encapsulates the vertices. If in 3D studio, we select the soccer player again and "Edit Envelopes", when we select a bone from the list, the envelope of that bone is shown in the viewport.
Note, your own viewport may not look exactly the same, depending on the settings under "Display".
In the illustration you can see the envelope of the Left Foot. There are highlighted in colour, the vertices it effects. Red means they're effected a lot, blue means they're effected a little. Notice that some vertices on the other foot are highlighted in blue. This has happened because in the models start position, the feet were close together, and therefore the vertices on one foot were within the envelope of the other. This is the cause of many issues when setting up Bone systems, also referred to as Rigging.
Max offers many ways of editing envelopes, but I'm only going to talk about one quick and dirty method for now. The darker red circles around the foot represent the limits of the effect area for that bone. By clicking on the small grey boxes where they intersect you can select that outer limit, and then adjust it's radius, either by dragging on it, or more precisely with the number spinner in the menu. By making it smaller, at some stage the vertices of the other foot are no longer effected. You need to adjust both feet before the model starts to look right. Then continue with the carves and thighs.
This subject is covered better in other tutorials on the net, but that should get you started.
NOTE: Make sure you have no zero weights in your model. If a vertex is connected to a bone with a weight of 0.000, it has the effect of attaching that vertex to the root of the model when imported into Away3D.
To avoid this, when you have finished rigging, set the "Remove Zero Limit" in the skin modifier palette to 0.01 and hit "Remove Zero Weights". You are then ready to export.
Finally it's time to export to MD5. Under Max Script, choose Run Script and find the MD5 exporter script you downloaded earlier. I tend to put my scripts in the script folder of Max, just because it's the default directory opened by Max.
Choose export and you'll be prompted to choose a name for your file. Then you will be asked for another name for the animation file. These two files (.md5mesh and .md5anim) are needed for the mocap animation, and generally speaking need to come from the same model. However, when you have exported one mesh, you can then apply another bip file and tick "export md5anim only" so you use the same model with different motion files, as in the example.
NOTE: When you press "Export", your computer will most likely freeze. Max Script, much like other scripting languages, can paralyse your processor when running through big loops, and believe me there's a lot of number crunching and writing going on here. My advice, go make a cup of coffee. On my machine the exporter hasn't actually crashed yet, though I have sometimes lost patience with it and restarted Max. You can improve performance, by going into Max's preferences and increasing the allocated memory for script. (Customize>Preferences>Max Script> Initial Heap Allocation). I set mine to 50Mb.
Now all that's left is to look at the source for David Lenaerts example from the Away3D repository and start swapping his files out with your own. I have included the entire source of my effort here, though admittedly it's not commented very well. The material has been made into a mipmap, i.e. resized to a square in Photoshop.
For some reason the texture coordinates get reversed between md5 and Broomstick. I guess this may change in future builds, but for now the work around was simply to reverse the number on the players shirt in Photoshop.
Disclaimer: The Broomstick branch of Away3D is in constant development, as is the Flash player, and there is no guarantee these files will work with your installed library, without a little tweeking :O)
(They are compiled against the github version, 24th may.)
NOTE: A difference in the coordinate space between MD5 format and Flash results in all models and animations being mirrored on the x-axis when viewed in Away3D 4.0
To see animations and models as they appear in MAX, simply apply a scaleX = -1; after import to Away3D.
(They are compiled against the github version, 24th may.)
NOTE: A difference in the coordinate space between MD5 format and Flash results in all models and animations being mirrored on the x-axis when viewed in Away3D 4.0
To see animations and models as they appear in MAX, simply apply a scaleX = -1; after import to Away3D.
Enjoy! And please comment with your successes, failures, comments and tips!
UPDATE: In response to the high demand, (from MatOfLink at least) here's a method for putting guns in hands, shoes on feet, hats on head, etc.
When your MD5 mesh has loaded, add a Loader3D to it. This is where your prop will appear.
gunholder = new Loader3D();
gunholder.addEventListener(LoaderEvent.RESOURCE_COMPLETE, adjustGun);
_mesh.addChild(gunholder);
So far so good. When the gun loads it will likely be twisted in relation to the rest of the model, depending on which format it is and which software it was exported from. For obj files coming from Max I've found this simple routine aligns the object the same way as in Max. At the same time you can apply materials.
private function adjustGun(evt:LoaderEvent):void {
var i:int;
var gunMat:BitmapFileMaterial = new BitmapFileMaterial("assets/images/gun.jpg");
for (i = 0; i < gunholder.numChildren; i++) {
var m:Mesh = gunholder.getChildAt(i) as Mesh;
m.rotationX = 90;
m.rotationY = 90;
m.material = gunMat;
}
}
Now your gun should be in the viewport. You need to know the index of the particular bone you want to follow. This you can either read in the debugger, by trial and error, or via the jointIndexFromName from name function on the skeleton class (later...)
Once you know the index of the bone (called "joint" in Away3d) you want to follow add this to your rendering loop:
gunHolder.transform = (_mesh.animationState as SkeletonAnimationState).globalPose.jointPoses[26].toMatrix3D();
And that's it! You basketball player is now armed and dangerous.
If I get round to it I'll post an updated source. Otherwise shout out below for help!
Now let's see some games...
UPDATE: In response to the high demand, (from MatOfLink at least) here's a method for putting guns in hands, shoes on feet, hats on head, etc.
When your MD5 mesh has loaded, add a Loader3D to it. This is where your prop will appear.
gunholder = new Loader3D();
gunholder.addEventListener(LoaderEvent.RESOURCE_COMPLETE, adjustGun);
_mesh.addChild(gunholder);
So far so good. When the gun loads it will likely be twisted in relation to the rest of the model, depending on which format it is and which software it was exported from. For obj files coming from Max I've found this simple routine aligns the object the same way as in Max. At the same time you can apply materials.
private function adjustGun(evt:LoaderEvent):void {
var i:int;
var gunMat:BitmapFileMaterial = new BitmapFileMaterial("assets/images/gun.jpg");
for (i = 0; i < gunholder.numChildren; i++) {
var m:Mesh = gunholder.getChildAt(i) as Mesh;
m.rotationX = 90;
m.rotationY = 90;
m.material = gunMat;
}
}
Now your gun should be in the viewport. You need to know the index of the particular bone you want to follow. This you can either read in the debugger, by trial and error, or via the jointIndexFromName from name function on the skeleton class (later...)
Once you know the index of the bone (called "joint" in Away3d) you want to follow add this to your rendering loop:
gunHolder.transform = (_mesh.animationState as SkeletonAnimationState).globalPose.jointPoses[26].toMatrix3D();
And that's it! You basketball player is now armed and dangerous.
If I get round to it I'll post an updated source. Otherwise shout out below for help!
Now let's see some games...
Labels:
3D,
3D Studio MAX,
Away3d,
Broomstick,
flash,
Molehill
Saturday, 16 April 2011
Waves and models

A practical application of a wave formula, animating a Manta Ray.
To keep the body steady while animating the "wings" the formula applies amplitude depending on distance from the centre, multiplied by a cosine to give a fairly smooth transition from centre to wing tip. The formula is still fairly simple and can definatly be improved upon. The movement, though graceful is not true to life (yet).
The Coast/Swim button will freeze and start the animation less abruptly then simply turning animation on and off.
This demo was inspired by a WebGL JellyFish by Aleksandar Rodic.
The source files are there. The model, by "Kare Ola" can be downloaded from TurboSquid
Subscribe to:
Posts (Atom)